Understanding The Stages Of Brussels Sprout Growth: A Comprehensive Guide
Brussels sprouts, often hailed as a superfood, have gained immense popularity for their nutritional benefits and versatility in cooking. Whether you're a gardening enthusiast or someone interested in understanding how this vegetable grows, knowing the stages of Brussels sprout growth is essential. These small, cabbage-like vegetables require specific conditions to thrive, and understanding their growth stages can help you cultivate them successfully. This article delves deep into the various phases of Brussels sprout growth, offering expert insights and actionable tips to ensure a bountiful harvest.
Brussels sprouts belong to the Brassica family, which also includes broccoli, cauliflower, and kale. These plants are cool-season crops that thrive in temperate climates. Their growth process is fascinating, involving several distinct stages from seed to harvest. Whether you're growing them in your backyard or simply curious about their life cycle, this guide will provide you with comprehensive knowledge backed by scientific research and expert advice. By the end of this article, you'll have a clear understanding of how Brussels sprouts grow and what you can do to optimize their development.
In this article, we'll explore the 10 critical stages of Brussels sprout growth, from germination to harvest, and provide practical tips for each phase. We'll also discuss the ideal growing conditions, common challenges, and how to overcome them. By following this guide, you'll be equipped with the expertise and confidence to grow healthy Brussels sprouts or appreciate the effort that goes into producing this nutritious vegetable. Let's dive in!
Read also:Cho Seungwoo Wife A Glimpse Into Their Life Together
Table of Contents
- Stage 1: Seed Germination
- Stage 2: Seedling Development
- Stage 3: Vegetative Growth
- Stage 4: Stem Elongation
- Stage 5: Bud Formation
- Stage 6: Sprout Development
- Stage 7: Maturation
- Stage 8: Harvesting
- Stage 9: Post-Harvest Care
- Stage 10: Storage and Usage
Stage 1: Seed Germination
The journey of Brussels sprouts begins with seed germination. This stage is crucial, as it sets the foundation for healthy plant growth. Brussels sprout seeds are small and require specific conditions to germinate successfully. The ideal temperature for germination is between 45°F and 85°F (7°C to 29°C), with optimal germination occurring at around 70°F (21°C).
To ensure successful germination, plant the seeds in well-draining soil with a pH level of 6.0 to 7.5. The soil should be rich in organic matter and kept consistently moist but not waterlogged. Germination typically takes 5 to 10 days, depending on the temperature and soil conditions. During this stage, it's essential to provide adequate sunlight or use grow lights if planting indoors.
Key Tips for Germination
- Use high-quality seeds from a reputable supplier.
- Maintain consistent soil moisture during germination.
- Avoid overwatering, as it can lead to fungal diseases.
Stage 2: Seedling Development
Once the seeds have germinated, the next stage is seedling development. During this phase, the young plants focus on establishing a strong root system and developing their first set of true leaves. Seedlings are delicate and require careful attention to ensure they grow into healthy, robust plants.
At this stage, it's crucial to provide the seedlings with adequate sunlight, ideally 6 to 8 hours per day. If growing indoors, use grow lights to supplement natural light. The soil should remain moist but not soggy, and it's advisable to thin out overcrowded seedlings to prevent competition for nutrients and space.
Common Challenges During Seedling Development
- Pests: Aphids and flea beetles can attack young seedlings. Use organic pest control methods to protect them.
- Diseases: Damping-off disease is common in overly wet soil. Ensure proper drainage to prevent this issue.
Stage 3: Vegetative Growth
After the seedlings have developed a few sets of true leaves, they enter the vegetative growth stage. This is when the plant focuses on growing its leaves and stems. During this phase, Brussels sprouts require plenty of nutrients, particularly nitrogen, to support their rapid growth.
It's essential to fertilize the plants with a balanced fertilizer every 3 to 4 weeks. Additionally, ensure that the plants receive consistent watering, as fluctuations in moisture levels can stress the plants and affect their growth. Mulching around the base of the plants can help retain soil moisture and regulate temperature.
Read also:Discover The World Of Yailin Erome A Rising Star In The Digital Era
Ideal Growing Conditions
- Full sun exposure for at least 6 hours daily.
- Well-draining soil rich in organic matter.
- Consistent watering to maintain soil moisture.
Stage 4: Stem Elongation
As the plants continue to grow, they enter the stem elongation stage. During this phase, the main stem of the Brussels sprout plant begins to stretch and develop nodes where the sprouts will eventually form. This stage is critical, as it determines the plant's overall structure and yield.
To encourage healthy stem elongation, ensure that the plants are spaced adequately. Brussels sprouts require about 18 to 24 inches of space between plants to allow for proper air circulation and growth. Pruning the lower leaves can also help redirect energy toward sprout development.
Stage 5: Bud Formation
Bud formation marks the beginning of sprout development. Small buds start to appear at the leaf axils along the main stem. These buds will eventually grow into the edible sprouts we know and love. This stage is highly dependent on environmental conditions, particularly temperature and sunlight.
Brussels sprouts thrive in cool weather, and bud formation is often triggered by a drop in temperature. If you're growing them in a warmer climate, consider planting them in late summer or early fall to ensure they experience cooler temperatures during this critical stage.
Stage 6: Sprout Development
Once the buds have formed, they begin to develop into mature sprouts. This stage requires careful monitoring, as the sprouts are susceptible to pests and diseases. Regularly inspect the plants for signs of infestation or disease and take appropriate action if necessary.
During sprout development, it's important to continue providing adequate nutrients and water. A potassium-rich fertilizer can help promote healthy sprout growth. Additionally, ensure that the plants receive consistent sunlight to support photosynthesis.
Common Pests and Diseases
- Cabbage worms: These pests can damage the leaves and sprouts. Use row covers or organic pesticides to control them.
- Clubroot: A soil-borne disease that affects Brassica plants. Rotate crops and maintain soil pH to prevent it.
Stage 7: Maturation
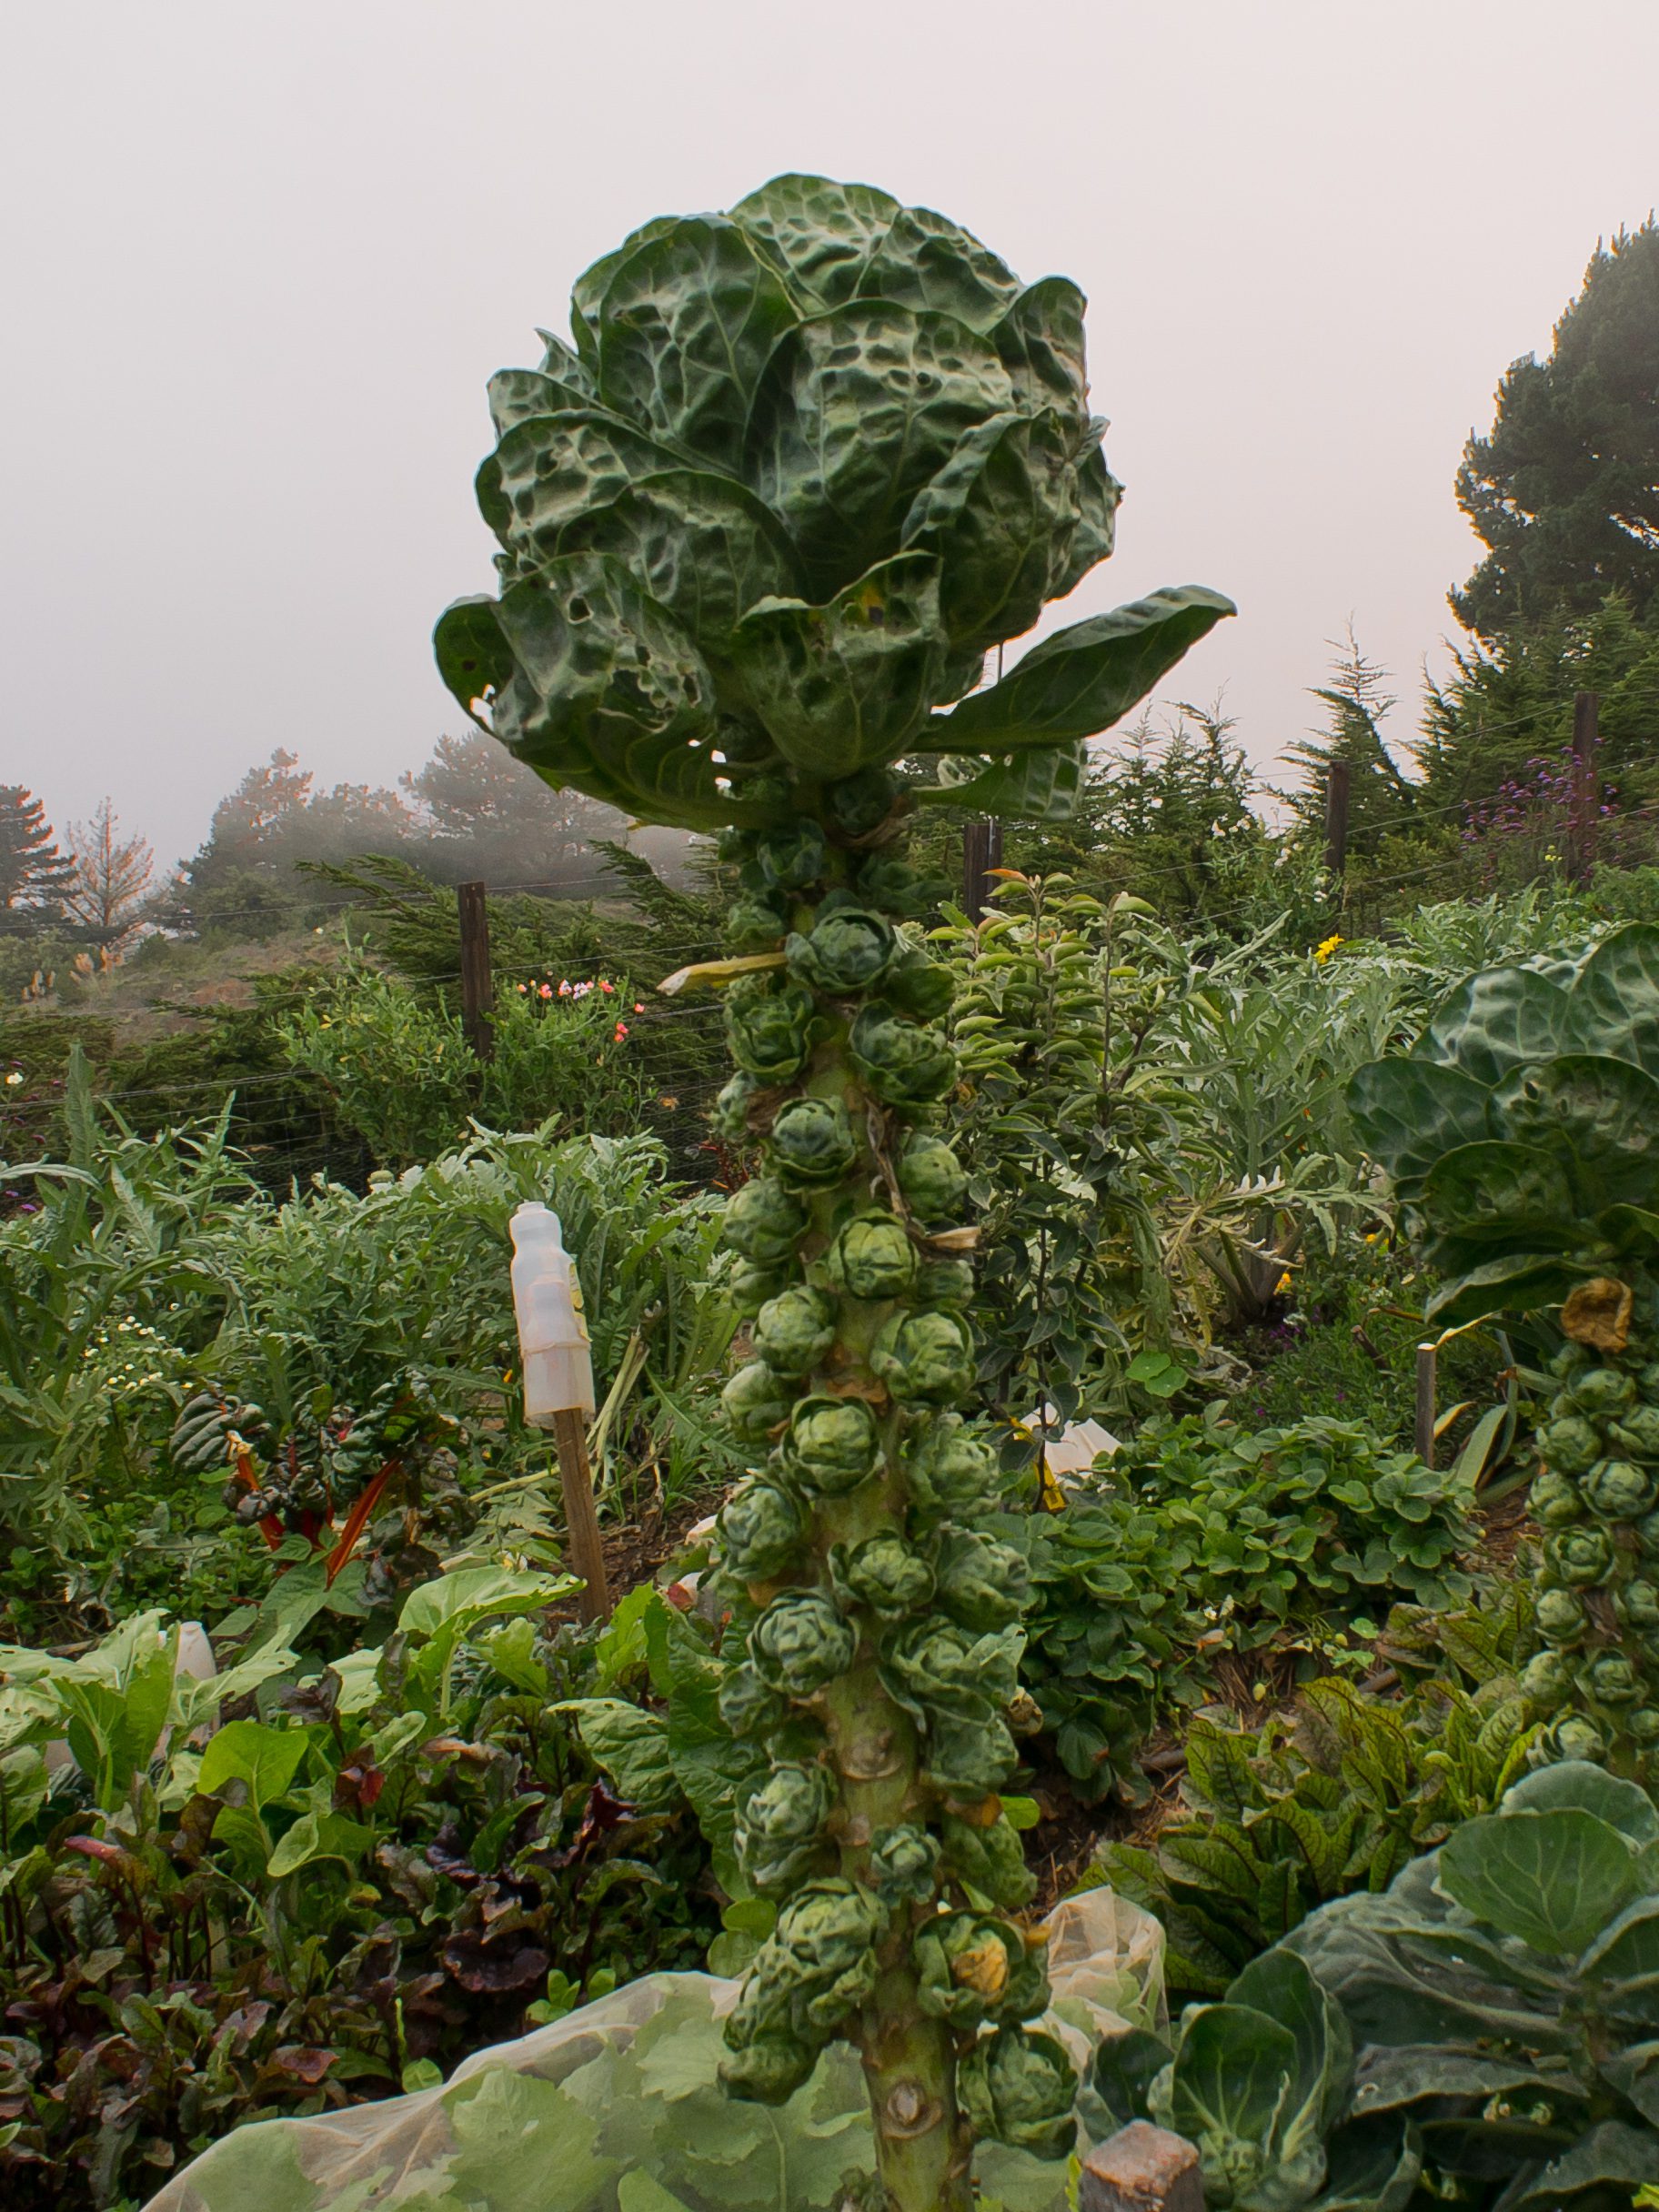
As the sprouts continue to grow, they reach the maturation stage. At this point, the sprouts should be firm and compact, with a diameter of about 1 to 2 inches. The lower sprouts typically mature first, followed by those higher up the stem.
To encourage even maturation, consider removing the growing tip of the plant about 4 to 6 weeks before the expected harvest date. This technique redirects the plant's energy toward sprout development and ensures a more uniform harvest.
Stage 8: Harvesting
Harvesting is the most rewarding stage of Brussels sprout growth. The sprouts are ready to be picked when they are firm, green, and about 1 to 2 inches in diameter. Start by harvesting the lower sprouts first, as they mature earlier than those higher up the stem.
To harvest, simply twist or cut the sprouts from the stem. It's best to harvest them in the morning when they are crisp and full of moisture. If you're not ready to use them immediately, store the harvested sprouts in a cool, dark place to maintain their freshness.
Stage 9: Post-Harvest Care
After harvesting, it's important to care for the remaining plants properly. If the growing season allows, Brussels sprouts can continue producing sprouts for several weeks. Continue to water and fertilize the plants as needed to support ongoing growth.
Additionally, remove any damaged or diseased leaves to prevent the spread of pests and diseases. Proper post-harvest care ensures that the plants remain healthy and productive for as long as possible.
Stage 10: Storage and Usage
Once harvested, Brussels sprouts can be stored in the refrigerator for up to 3 weeks. To extend their shelf life, store them in a perforated plastic bag to allow for proper air circulation. Alternatively, you can freeze them for long-term storage.
Brussels sprouts are incredibly versatile in the kitchen and can be roasted, steamed, sautéed, or even grilled. Their nutty, slightly sweet flavor pairs well with a variety of ingredients, making them a favorite among chefs and home cooks alike.
Conclusion
Understanding the stages of Brussels sprout growth is essential for anyone looking to cultivate this nutritious vegetable successfully. From seed germination to harvest, each stage requires specific care and attention to ensure healthy plant development and a bountiful yield. By following the tips and guidelines outlined in this article, you can grow Brussels sprouts with confidence and enjoy the fruits of your labor.
We hope this guide has provided you with valuable insights into the fascinating world of Brussels sprout growth. If you found this article helpful, feel free to share it with fellow gardening enthusiasts or leave a comment below with your thoughts and experiences. Happy gardening!
:max_bytes(150000):strip_icc()/growing-brussels-sprouts-1403442-04-a01389c1755d49a6a1bd758340ea205a.jpg)
